Monday 30 June 2014

HOWTO: Make Your Own DIY Doge Meme Nail Art Decal

Welcome to Shitty Nail Art Monday, where I am actually debuting a new section here on Cthulhu. For the first time I am doing to slot it in both categories, but in the future, I will be doing two separate posts. Yup. Finally doing it. Nail Art HOWTOs. Whoever knew that a girl who ran "Shitty Nail Art Mondays" could also show you how to make your own Shitty Nail Art?! HOW ABOUT THAT! Anyhow. Today I'm gonna teach you how you can make your very own Doge meme nail decal.

(Seriously?)

Seriously.

Making a DIY Doge Meme Nail Decal

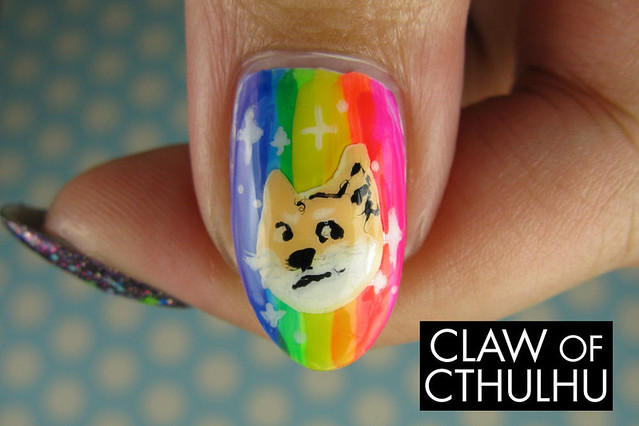
I based my Doge meme nail art based on the image that Digital Nails posted on their Facebook to announce the Doge collection. This nail art is accomplished by two parts: a DIY decal, and a rainbow background done on the nail. What you will need for this Doge Meme Nail Art:

DOGE DECAL
+ clean plastic bag (I used a sandwich bag)
+ scissors
+ tweezers
+ fine nail art brush
+ white polish (I used OPI Alpine Snow)
+ yellow polish (I used Essence Wanna Be Your Sunshine)
+ orange or red polish (I used Red Fame Fatal)
+ black polish (I used Sally Hansen Black Out)

RAINBOW BACKGROUND
+ fine nail art brush
+ white polish (I used OPI Alpine Snow)
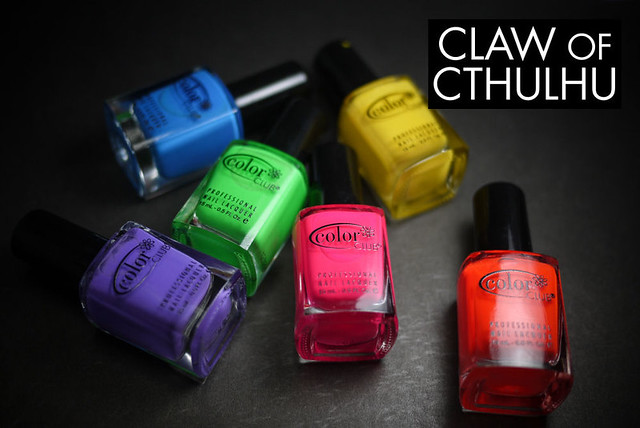
+ bright or neon purple polish (I used Color Club Pucci-Licious)
+ bright or neon blue polish (I used Color Club Chelsea Girl)
+ bright or neon green polish (I used Color Club What A Shock)
+ bright or neon yellow polish (I used Color Club Almost Famous)
+ bright or neon orange polish (I used Color Club Wham! Pow!)
+ bright or neon pink polish (I used Color Club Warhol)

Total time required: 6-8 hours

Now, you can actually work on the RAINBOW BACKGROUND, the same time as you work on the DOGE DECAL, no problem. But first, let's start off with the decal. You will need to paint two coats of white polish on your clean plastic bag.

Making a DIY Doge Meme Nail Decal

Making a DIY Doge Meme Nail Decal

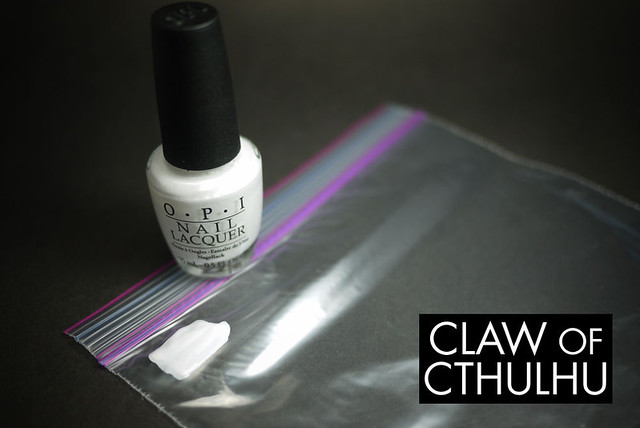
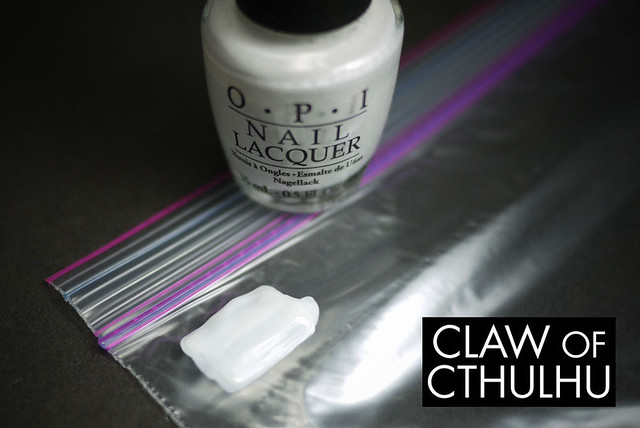
You want two coats because the decal has to be thick enough to lift off from the plastic bag and it creates a bit of durability. No more than two coats because if it's *too thick*, it will rise off the nail!

Set aside the plastic bag and let the white nail polish dry.

Grab your bright or neon polishes.

Making a DIY Doge Meme Nail Decal

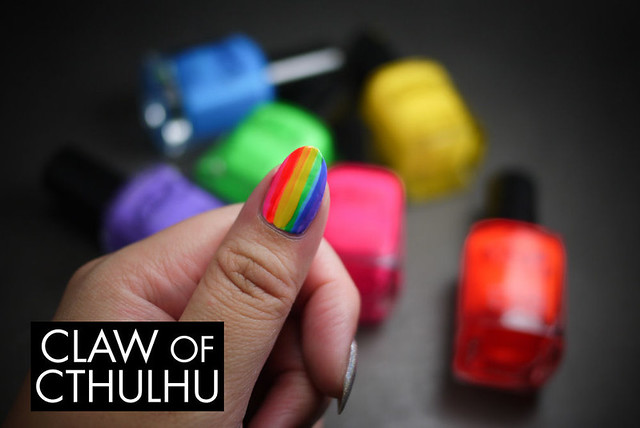
Paint your nail with one coat of white.

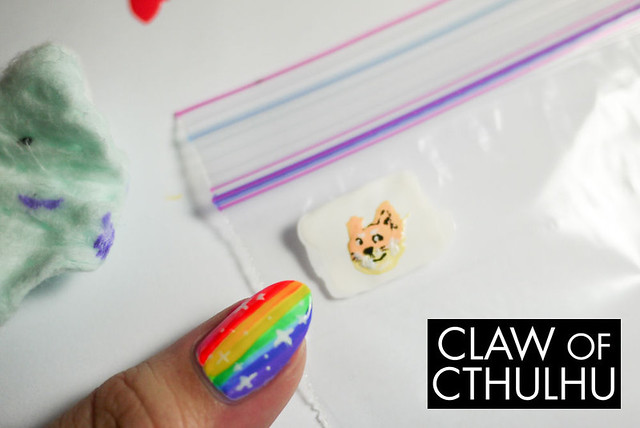
From the outside edge of the nail, start painting your rainbow. Don't mind the overlap as it creates a slight gradient effect. Work by painting one edge of the nail and then switch to the other edge - working towards the centre. My order was: purple, pink, blue, orange, green, yellow. Using the polish brush is fine for this.

Making a DIY Doge Meme Nail Decal

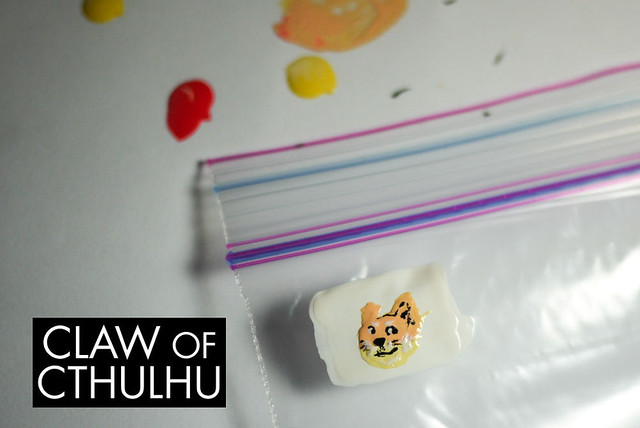
Return to the plastic bag decal. Start creating Doge's head by painting a circle with two colours and shapes for ears. I used a mixture of white, yellow and red polish to create two distinct colours. When mixing your colours, the less you put in - the more subtle the colours are. Be careful! When painting Doge's face, try not to go over where you've painted. Painting with nail varnish is VERY tricky as it sticks to the layers underneath it and makes it tacky again!

Making a DIY Doge Meme Nail Decal

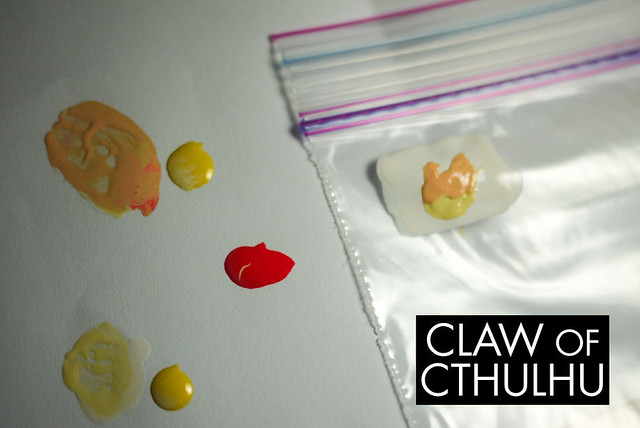
Let set for 5-10 minutes.

Begin to paint the face details - again, less is more. Pick up the tiniest amount of black polish on your nail art brush and create the nose. This centers the rest of the face. Paint the eyes and mouth. You can add optional white highlights, but it's unnecessary.

Does it look like a lumpy mess? Don't worry about it. It's normal.

Making a DIY Doge Meme Nail Decal

Let set again. This time, you are letting it set overnight. I waited about 5 hours.

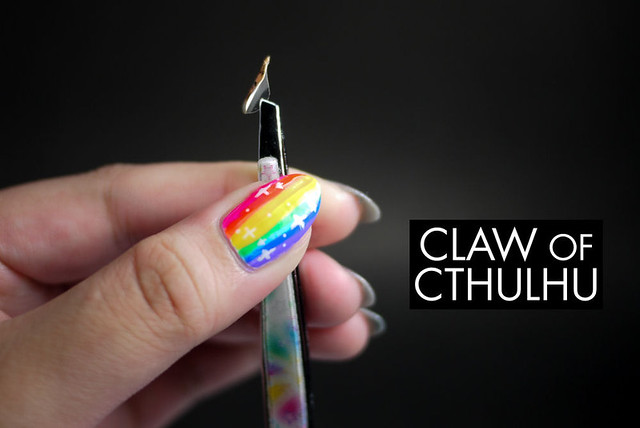
While waiting for the decal to set, you can paint tiny stars on your rainbow nail with your fine nail art brush. I painted little crosses and added little dots.

Making a DIY Doge Meme Nail Decal

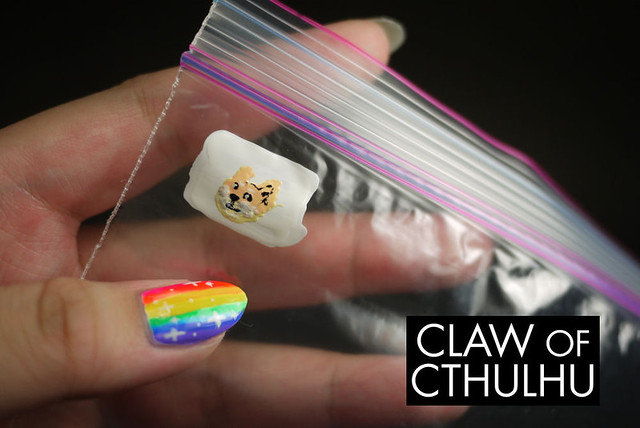
I made a few modifications to my Doge face before I set mine overnight. Once dry and hardened to the touch, use a pair of scissors to cut out your decal. I cut a larger portion of the decal out, and then trimmed closer and closer to the shape I wanted Doge to be.

Making a DIY Doge Meme Nail Decal

Making a DIY Doge Meme Nail Decal

Making a DIY Doge Meme Nail Decal

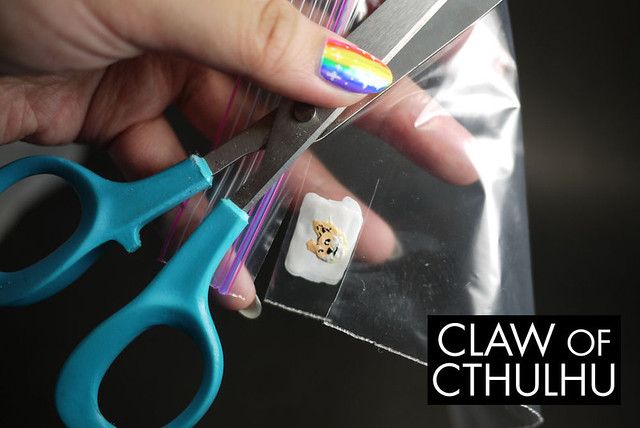
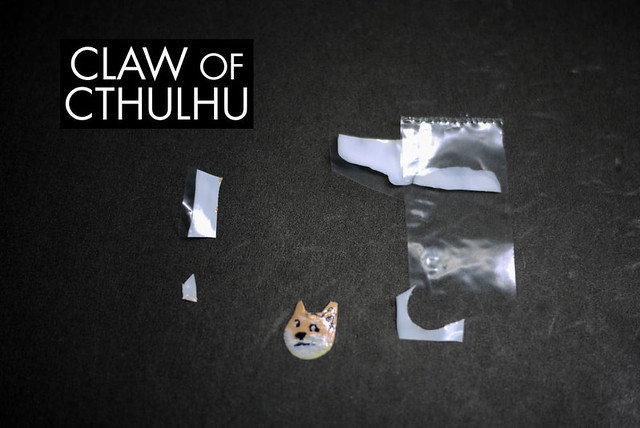
Very carefully, use a pair of tweezers to lift your Doge decal off from the plastic.

Making a DIY Doge Meme Nail Decal

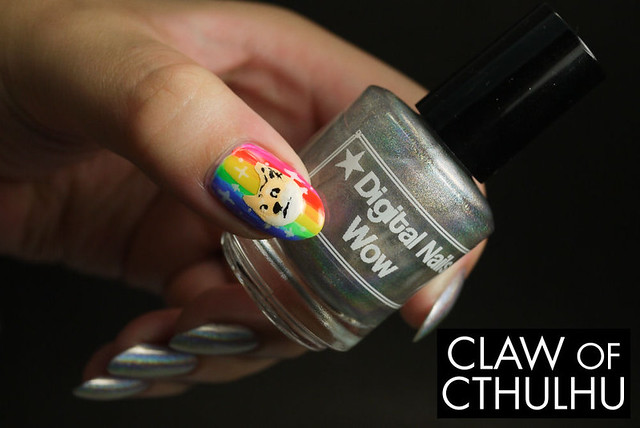
Dab your nail lightly with a bit of top coat, and set your decal.

Finish the whole look off with a nice coat of top coat. I used two coats because I am insane.

Making a DIY Doge Meme Nail Decal

Making a DIY Doge Meme Nail Decal

What do you think of making your own nail art decals? Do you have the patience? Be sure to let me know if you try out any of my crazy HOWTO Shitty Nail art designs by tagging me on Instagram!

Thursday 26 June 2014

Rainbow Honey Sea Star Swatch and Review

Dear lord, whenever you are sick and you think you are getting better, you should still continue to rest. Because relapsing is the worst! Anyway, thankfully it's the weekend and I am going to be gunning hard for a sleep in. Like, that's all I want in the world right now. But luckily I have a super pretty nail polish to post on good ol Cthulhu before I depart for the weekend. Speaking of departing, I am scheduling a week long break for the second week of July. So I hope next week's posts are entertaining enough for then! In the meantime, here's some Rainbow Honey.

Rainbow Honey Sea Star Swatch (over top of Essence That's What I Mint!)

Rainbow Honey Sea Star Swatch (over top of Essence That's What I Mint!)

Rainbow Honey Sea Star Swatch (over top of Essence That's What I Mint!)

Rainbow Honey Sea Star Swatch (over top of Essence That's What I Mint!)

This is Rainbow Honey Sea Star which is described on the site as "a coral starfish mix and mingle in this sparkling sea of aqua, light blue, and iridescent glitters!". I wish this one was inspired from something because it's very pretty in the bottle. Application wise, this one went on OK as far as giant glitters and shape glitters go. Some dabbing that needs to be done - some fishing. The glitters lay on quite thick and because my nail is curved, I had some stars raise up, but two coats of Seche Vite fixed that right up. Here's my swatch of two and a half ish coats over top of Essence That's What I Mint!:

Rainbow Honey Sea Star Swatch (over top of Essence That's What I Mint!)

Rainbow Honey Sea Star Swatch (over top of Essence That's What I Mint!)

Rainbow Honey Sea Star Swatch (over top of Essence That's What I Mint!)

Rainbow Honey Sea Star Swatch (over top of Essence That's What I Mint!)

Rainbow Honey Sea Star Swatch (over top of Essence That's What I Mint!)

Rainbow Honey Sea Star Swatch (over top of Essence That's What I Mint!)

Rainbow Honey Sea Star Swatch (over top of Essence That's What I Mint!)

I really love this polish over Essence That's What I Mint!, but with that said, I think with the palette of this polish - bits of yellow, coral, and aqua - it gets to be very picky with what you can use as an undie. It looked OK over Color Club Over The Moon, a blue holo but not as good as it does with the minty polish shade. I can't imagine rocking this over a bold red, for example. I definitely love it over mint though, that's for sure. Also this was a bit of a hassle to get off - I used two go's of Julep's Party Over (foil method), I really packed on the glitters!!

What do you think of Rainbow Honey's Sea Star? How would you pair it up?

Wednesday 25 June 2014

Zoya Magical PixieDust Vega Swatch and Review

Happy Hump Day! I'm still a sick factory but I feel a bit better. Also my package came in the mail so I am excited over my black mermaid skirt and I got some custom Studio Ghibli leggings, ZOMG. Really, life is grand right now asides being a bit stressed but... It will be good. Yes. Anyway I have a backlog post today - I have Zoya Vega, from the MAGICAL PixieDust collection. (Haha, MAGICAL! I don't know why that's so funny.)

This is Zoya Vega, a dusty baby blue toned textured and glitter mix. It's one of Zoya's PixieDusts... that is MAGICAL! By "Magical", Zoya just means that there are holographic glitters. Zoya Vega is actually a one coater, but for whatever reason, I thought it would be a good idea to do two. (It's not, really.) Application was nice here. Laid out a fairly solid foundation, and the second coat adhered to the first coat very smoothly. Here's my swatch in two coats without top coat:

Zoya Vega Swatch

Zoya Vega Swatch

Zoya Vega Swatch

Zoya Vega Swatch

Zoya Vega Swatch

I really liked this polish but I did have a couple of gripes with it. For one, it didn't suit my skin tone very nicely. I have a bit of lobster skin tone going on and I apologize. And another, the two coats were REALLY REALLY textured. I had read that these polishes were super textured but these actually pulled on my high quality nylon leggings, what the! So next time I may consider one coat only. Also I had to use my Julep Party's Over glitter removal kit to get it off.

What do you think of the MAGICAL PixieDusts? Are you done with textures or would you opt for some holographic glitters in the mix?

Tuesday 24 June 2014

Sally Hansen 420 Pacific Blue Swatch and Review (Comparison of 2009 and 2014 formula, and bonus nail art!)

OK guys, I read my post yesterday and thought it was a bit grouchy. But that's because I woke up with a fever today and all the phlegm town and ugh. But you know, it's way better now than later this summer (#becauseweddings) so I am going to just update here and then power through the day. And by powering through the day, I actually just mean sleeping on the couch watching World Cup and most likely falling asleep. I'm kind of bummed out I'll miss out on Cheap Tuesday burgers but you know what, I won't miss out on Cheap Polish Tuesday because this one is apparently a big deal. This is Sally Hansen Pacific Blue (which can be found for $2-3 at most drugstores).

(Wait there's two?) I'll get to that in a sec.

Sally Hansen Pacific Blue Swatch

Sally Hansen Pacific Blue Bottles

Sally Hansen Pacific Blue Bottles

Sally Hansen Pacific Blue Bottles

Admittedly, I was never an original owner of Sally Hansen Pacific Blue until recently. Either of them. But last week the nail polish community (as passionate as they are), exploded over seeing that their beloved 2009 formula of Sally Hansen Pacific Blue was reformulated. Not only was it reformulated, but the colour was completely redone.

Here's why the 2009 permutation was so loved:

+ one coater blue
+ non-staining blue
+ perfect medium toned blue
+ considered a "gateway polish"
+ rumours of a marijuana scent

Alright well I can never pass up a non-staining blue - that shit is almost unheard of. So I had to try it myself. Also a one coater? OK we'll see about that one. Here's my one coat swatch of the 2009 formula of Sally Hansen Pacific Blue with no top coat:

Sally Hansen Pacific Blue Swatch

Sally Hansen Pacific Blue Swatch

Sally Hansen Pacific Blue Swatch

Sally Hansen Pacific Blue Swatch

Let's take a look at the new 2014 formula. Apparently it's "disgusting and runny and terrible". Here's two coats of the *new* Sally Hansen Pacific Blue:

Sally Hansen Pacific Blue Swatch

Sally Hansen Pacific Blue Swatch

Sally Hansen Pacific Blue Swatch

Sally Hansen Pacific Blue Swatch

If you haven't caught onto the differences, here's a comparison swatch. One coater 2009 original Pacific Blue creme on my index and ring, and two coats of the *new* 2014 Pacific Blue:

Sally Hansen Pacific Blue Swatch

Sally Hansen Pacific Blue Swatch

Sally Hansen Pacific Blue Swatch

CLAW of CTHULHU'S VERDICT: OK guys I get it. The 2009 Pacific Blue polish is awesome - it's just like you said - a non-staining, one coater perfect medium toned blue creme. I am definitely biased towards creme polishes. They're so versatile for use of nail art. I can see why it was called a "gateway polish" to get into the hobby because the formula is very sleek and allowed for so many creative endeavors into the hobby. Did it smell like marijuana? Ehhhh I dunno about that. I think if you look hard enough for it, you can smell it but it doesn't smell like straight up marijuana. (Yes I would know this because BC Bud, you know.)

Now the 2014 formula... Guys, let's be real. It's not as shitty as you guys are making it out to be. I don't like it. It's not my kind of blue, it's definitely not something I would go out of my way to buy. The formula is a two coater - which is honestly pretty standard for most of the polishes I own! I'm not a huge fan of polishes that have a hint of shimmer to them either. I definitely don't care for it much and the 2014 formula will never be a good nail art polish.

My personal final stance is mostly indifference. As an Essence fan, we see polishes in their line come and go, and some of them being great formulas as well. I feel that Sally Hansen should have gone one of two routes: 1) Completely discontinue Sally Hansen Pacific Blue 2009 formula; or 2) Continue producing Sally Hansen Pacific Blue in its 2009 permutation and introducing the "2014 Pacific Blue" as its own entity. Not 420 Pacific Blue. That really sucks for fans of Pacific Blue who are really gung ho. I would be pissed off too.

As a bonus, generally one coaters fare well as stamping polish and I think Pacific Blue did fairly decent over top of white, at least. I think that was pushing it a bit. Still, it reminds me of those white and blue chinaware! I used Nailz Craze NC03 and NC06 for these.

Sally Hansen Pacific Blue Nail Art

Sally Hansen Pacific Blue Nail Art

For whatever reason, I actually ended up buying two back-ups of Pacific Blue (2009 formula) (I feel like I shouldn't have to clarify that one haha). If I had to be honest with myself, I truly buy stuff when I am stressed out and the next month is definitely stressful.

What do you make of the great Pacific Blue debacle? Do you feel like people are making something of nothing? Is Pacific Blue one of your gateway polishes?

Monday 23 June 2014

Calligraphy and Rose Nail Art

I may die. I can feel a sickness coming on and I am not sure if it will simmer down, or kill me before I have a week of weddings to do. This is bad. I am kind of in panic mode. After next week, I may take a week off from Claw of Cthulhu. Or two weeks. I will try not to do three months. That was sort of bad. I could just do nail swatches instead of regular programming - that stuff is kind of easy. Anyway this nail art kind of describes everything I am thinking. I hope you enjoy it.

"Fuck" Calligraphy and Thumb Roses Nail Art

"Fuck" Calligraphy and Thumb Roses Nail Art

"Fuck" Calligraphy and Thumb Roses Nail Art

"Fuck" Calligraphy and Thumb Roses Nail Art

Here's a list of things I used for this nail art:

+ nail art brush
+ Essence Give Me Nude, Baby! (white jelly base)
+ Sally Hansen Black Out (black lettering)
+ Essence Naughty and Pink! (roses)
+ Essence Free Hugs (rose highlights)
+ Essence L.O.L. (rose leaves)
+ Essence Beijos De Brazil (rose leaf shadows)

I (obviously) freehanded all of this - the calligraphy is a little more wonky that I would have liked but since I only paint with enamel, it's pretty hard to maintain a smooth look. I might try mixing it with thinner next time to experiment with different consistencies. I'm pretty happy with the roses, though. They look cute and intricate and a huge difference from my roses last year.

How would you approach calligraphy nail art? Should I bite the bullet and just use acrylic paints? (I'm trying my best to do lacquer only nail art! I know it's possible (see: @kgrdnr on Instagram)